Dead Rails Beginner Guide to Your First Full Run
October 30, 2026 · 5 min read
On this page
To beat Dead Rails, drive your train about 80 km, keep it fueled, reach a town before each night, and then survive the fight at the bridge at the end. Your first goal should not be loot. It should be learning to keep the train moving.
Dead Rails updates often and adds new classes, modes and locations. Many basic guides are from 2025, so we flag older numbers below. Dead Rails also has no redeem codes right now, so Bonds must be earned by playing.
Start of a run
- Pick up the gold bar in the starting town by holding left click on it, and drop it on a table at the Trading Post to sell it.
- Collect the money bag from the table. Older guides put this at $50.
- Go to the General Store and buy coal. It was $20 per piece in older guides.
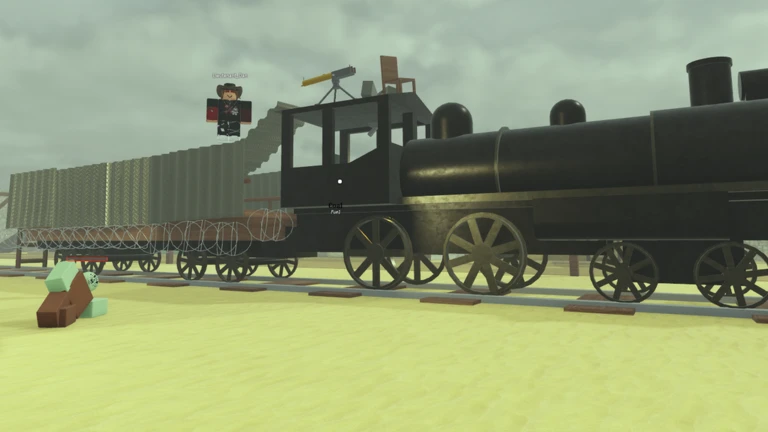
- Carry the coal to the train and drop it in the lit furnace.
- Flip the switch above the furnace to start moving.
Your sack carries extra items. In older guides, you press F to store an item and F again to take one out. You can also weld an item to the train with Z while dragging it. Use this for corpses you want to sell later.
Fuel comes first
A stopped train at night is how many runs end. Most things marked with a Fuel tag can go in the furnace. This order, based on one guide's advice, keeps the most money in your pocket:
- Cheap corpses, such as zombies, skeletons and wolves.
- Junk, such as newspapers, tumbleweed, books, wheels, chairs and barrels.
- Coal, when nothing else is on hand.
- Valuable corpses, such as vampires, outlaws, werewolves and unicorns, only in an emergency. Sell these instead.
A little over half a tank should get you the roughly 10 km between towns at full speed. Sources disagree on total coal for a full trip, from 19 to 32 pieces, so do not plan around one number. Refill at every town.
Towns are your safe stops
Fortified Towns come roughly every 10 km. Use each stop the same way:
| Building | What to do |
|---|---|
| Trading Post | Sell valuables and monster corpses |
| Sheriff's Office | Turn in outlaw bodies for bounty money |
| General Store | Buy coal, metal sheets and barbed wire |
| Gunsmith | Buy guns and ammo |
| Doctor | Buy healing items |
| Cemetery | Buy a revive for a fallen teammate at their gravestone |
If you can afford it, buy a gun early. Rifles and shotguns are the common upgrade after a revolver, and ammo is always limited, so aim for the head.
Surviving the night
One guide says the train's clock hits night at 9 PM, and that about 20 seconds of riding equals one in-game hour. Try to reach a town before dark.
- Zombies get more common at night. They are not worth much but work as fuel.
- Full Moon nights bring werewolves, and Blood Moon nights bring vampires. Their corpses sell well if you are armed, but they are dangerous for new players.
- Cover train openings with metal sheets and barbed wire. Newspapers work as cheap cover early on.
- If you are in a town when night falls, its turrets can kill monsters for you. You can then collect corpses for fuel and money.
Fight from the train when you can. Height and walls stop most zombies.
Looting without dying
Buildings near the track are for quick grabs. Do not wander far without a horse, and do not spend long away from your train when the sun is going down.
Watch for a zombie with a white beard and hat near a bank. This banker zombie can carry the code for the vault, which holds gold bars and Bonds. Banks are a safer early Bond source than the big locations below.
Big locations hold more loot but are much harder:
| Location | Where | Warning |
|---|---|---|
| Sterling | Somewhere between 9 and 75 km | One guide says its main buildings have no zombies, so it is a good first Bond stop |
| Fort Constitution | Somewhere between 9 and 75 km | Gun-using zombies and a boss, Captain Prescott |
| The Castle | About 38 km | Packs of vampires and werewolves. Arrive at dawn, with armor and ammo |
| Tesla Lab | Varies | Summons waves and a boss fight |
For a first run, skip the Fort and Castle unless you have friends and good guns.
Bonds and classes
Bonds are the lobby currency. They buy classes from the Tailor and trains. You can only change class before a run starts. One guide lists 10 Bonds for finishing a Normal run and 20 for Nightmare, plus Challenge Board rewards and loot.
Good first buys from a fan wiki updated in September 2026:
| Class | Bonds | Why |
|---|---|---|
| Miner | 15 | Starts with 2 coal, a pickaxe and a mining helmet with a light |
| Doctor | 15 | Starts with healing and can revive teammates by giving up half of your current health |
| Arsonist | 20 | Starts with 4 molotovs, double fire damage and fire immunity |
| Cowboy | 50 | Starts with a revolver, ammo and a horse |
| The Alamo | 50 | Starts with metal sheets and barbed wire |
| Conductor | 50 | Train runs 30% faster, starts with 2 coal |
Older guides list some lower prices, such as 35 for Cowboy, so check the Tailor. Miner and Conductor help most with fuel, and Doctor helps most in a group.
Train upgrades are a long-term goal. The Cattle Car was listed at 225 Bonds and the Armored Train at 275. New players can stay on the Default Train for a long time.
The final fight
Near 78.5 km, you reach Outlaw's Town, a fort full of armed outlaws. Slow down before you get there and use a long-range gun such as a Rifle.
- Clear the outlaws from a safe spot.
- Loot the huts before you start the bridge. One guide lists around 10 Bonds here.
- Heal, reload and get into cover.
- Turn the wheel or switch to lower the bridge.
- Hold out while enemies rush in. One 2025 guide says about four minutes.
- Cross when the bridge is down to win.
More players make this far easier, so bring friends if you can. Bring plenty of ammo, bandages and Snake Oil.
Quick tips
- Use a cheap class with useful starting gear.
- Sell everything at every town.
- Keep some money for coal at the next stop.
- Do not buy Bonds with Robux early on. A single full run with looting can earn plenty.
- Check the Dead Rails Roblox page for current events. A Halloween event is running right now.